Sunday, 4 October 2015

Patterns & Textures

Click on an image thumbnail to view its details and buying options


Hearts and Stars Background Wallpaper
© Photographer: Shaeree Mukherjee | Agency: Dreamstime.com

Maple Leaves Background Wallpaper
© Photographer: Shaeree Mukherjee | Agency: Dreamstime.com

Candy Background Wallpaper
© Photographer: Shaeree Mukherjee | Agency: Dreamstime.com

Hearts and Roses Background Wallpaper
© Photographer: Shaeree Mukherjee | Agency: Dreamstime.com

Leaf Motif Background Wallpaper
© Photographer: Shaeree Mukherjee | Agency: Dreamstime.com

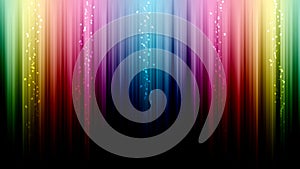
Rainbow lights HD background
© Photographer: Shaeree Mukherjee | Agency: Dreamstime.com

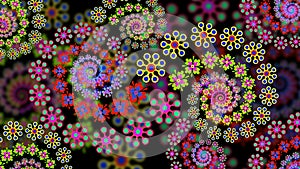
Floral Fractal Background
© Photographer: Shaeree Mukherjee | Agency: Dreamstime.com

Saturday, 23 May 2015

Summer Quote


Stock Photography

Friday, 15 May 2015

Floral Fractals in Photoshop

Floral Fractal Background
© Photographer: Shaereemukherjee | Agency: Dreamstime.com

In this tutorial I will show you how to make beautiful floral fractals in Photoshop CS3 or higher.

First, launch photoshop and create a new Document with 1920x1080px and 300 resolution.

Fill the Background with black colour.

Now with the Custom shape tool, create some flowers and line them up from smaller to bigger sizes as shown below.

Colour them as you wish. Make sure all the shapes are in a single layer, if not, them select the layers using the shift key and merge them by pressing Ctrl+E


Duplicate this layer by pressing Ctrl+J.

Press Ctrl+T in your keyboard to activate Fee Transform mode. Now, rotate them and also make the size a little smaller than the previous one.


 Now press Ctrl+Alt+Shft+T as many times you want to repeat and a spiral will start forming. When its done, select all the layers and merge them [Ctrl+E].


 Duplicate the spiral layer and press Ctrl+U for Hue/Saturation. Change the value of Hue to get different colours. Once you are happy with the colour, press OK or Enter.


Keep duplicating the layers, resize and rotate them as you wish and fill the page.


 Make a large flower and go to Filter--Blur--Gaussian Blur --Radius 8.5 .This layer should be placed below all others.


Now, take a soft brush and set the foreground colour to white. Click at the places you want to add some shine.


Set the mode to Overlay and opacity 76% 


This is the final result. 

I uploaded this image in Dreamstime and someone bought it recently. :) Click on the image to view details..and you can buy it from there...!!

Floral Fractal Background
© Photographer: Shaereemukherjee | Agency: Dreamstime.com


Stock Photography

Sunday, 10 May 2015

Low Poly Art in Illustrator

In this tutorial I will show you how to make a low poly art in the easiest way. You will need Adobe Illustrator CS3 or higher.

Remember these shortcuts : 
Selection tool : V
Pen tool : P
Eyedropper tool : I
Live Paint Bucket tool : K


Open Adobe Illustrator and create a new RGB document.

First you need a nice picture of a real object. I have taken a picture of oranges [that's my favourite fruit ;) ] 

Click on File--Place--select the picture--OK.....or simply drag & drop the picture to your workspace.

Keep the image selected and click 'Embed' .


Go to View--check Smart Guides and Snap to Point.


Create a new layer in the layers panel. Start by creating lines with the help of pen tool (P). First create the border and then form quadrilaterals (four sided geometric shapes). Next divide the quadrilaterals into triangles by drawing lines inside them. 


When it's done, it will look something like this image below.

 Turn off the visibility of the reference picture layer. Now you can see the cage. When you are happy with the result, start colouring , here is where the fun begins.

Select all Ctrl+A and press "K" on your keyboard to activate the live paint bucket tool. Click anywhere inside your drawing. Now you can colour the triangles each one separately. Press "I" for eye dropper tool. Click inside a triangle to get the colour, press K and click on that triangle to fill colour. Repeat this process for all the triangles. This will take some time, so be patient. Keep colouring and colour all the triangles.

When you have finished colouring, select all again and turn the stroke colour off to see the result. 


Select a nice colour for the background. It's done.

This is my final image. Click on the image to download. Hope you enjoyed the tutorial. :)


Stock Photography

Tuesday, 28 April 2015

The Blue Jackal

The Blue Jackal


(watch the 2D animation movie at the end of this page)

Once upon a time there lived a cunning jackal in the forest.


One day, driven by hunger, he came to a nearby village in search of food. Seeing him, a group of dogs began barking and started chasing him. 


The jackal fled in panic and dashed into a tub of blue dye that was kept outside a dyer's house. When he came out, he became blue in colour. Thinking that he was not the jackal they chased, the dogs dispersed.


When he returned to the forest, all the other animals ran in fright when they saw him.


The blue jackal told them that he was sent by the Gods to rule the forest and if they did not obey him, the Gods will punish them.


All the animals accepted him as their king. They built a stage for him and brought food for him everyday.


One day a group of jackals were passing by the forest. They lifted their heads and howled.


The blue jackal could not restrain himself and started howling too.


When the other animals saw him howling, they looked at him angrily and started growling.


The blue jackal fled from there and thus his reign ended.


Watch the 2D animation movie "The Blue Jackal".


Stock Photography

Wednesday, 15 April 2015

Light Streaks Wallpaper Tutorial in Photoshop

We are going to make a light streaks desktop wallpaper in Photoshop.

Light Streaks Desktop Wallpaper
1. For making this wallpaper you will need Photoshop, any version would do, CS3 or higher. First, launch Photoshop and create a new document. 

File--New or Ctrl+N

The dimensions should be 1920x1080 px, this gives an HD output. 75 ppi resolution is enough and choose RGB color mode.


2. Now select the Gradient tool (G) and choose a black and white gradient and both colors must have 100% opacity. Use shift while dragging the gradient tool. Make a linear gradient like the picture below. Double click on the background layer to unlock it.


3. Now, go to Filter--Distort--Wave


4. Select the settings as shown in the picture below.
No. of Generations: 10, Type: Square


You should get something like this.


5. Double click on the layer you just created and choose Gradient Overlay from the Layer Styles. Click on the small arrow next to Presets and select Spectrum. Choose the first one.


6. Change the Blend Mode to Linear Burn, Opacity: 65, Style: Reflected, Angle: 0 and click OK.


7. Create a new layer and repeat steps 2, 3 & 4 and change the blending mode of this layer to Soft Light. This will add some shine to our light streaks.


8. Now, create a new layer. Select the Rectangular Marquee Tool (M) and draw a small rectangle and fill it with black color. Keep the rectangle selected and go to Edit--Define Brush Preset. A new brush will be created. Now you can delete the layer containing the rectangle.


9. Select the brush you just created and go to 
Window--Brushes (F5)
Brush Tip Shape--Spacing: 160%


Shape Dynamics--Size Jitter: 100%, Angle Jitter: 16%, Roundness Jitter: 67%, Minimum Roundness: 38%


Scattering--Scatter: 596%, Count: 1


Resize your brush using ( [ ) & ( ] ) and click in your wallpaper to add tiny rectangles like I did.


10. Use a good font (Arial and size:200pt) to write your name or a quote and set the blending mode to Overlay. Now, double click on the text layer to access Layer Styles. Select Outer Glow--Blend Mode--Linear Light, Opacity: 75%, Color: ccffff, Spread: 8, Size: 7 and click OK.


Your Light Streaks Desktop HD Wallpaper is ready. :) 


Stock Photography