
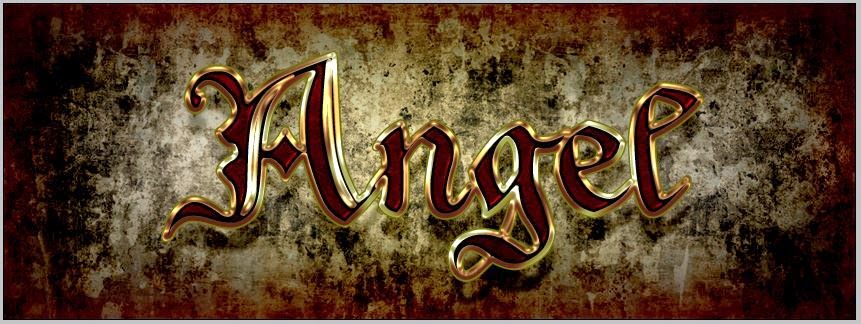
This is the final image.

First, you need to download two textures from the internet...1. An old paper texture for the background and 2. A red pattern (.PAT) for the text.
Create a new photoshop document -- File - New - 851x315 px , 75dpi resolution.
Now, File- Import - select the old paper texture and press enter. Resize the texture if necessary.
Double click on this layer to open layer styles and follow the instructions as shown in the images below.


When it's done, you will get a nice grunge effect background like this.

Now write a text...whatever you like , we will stick to 'Angel' for this tutorial. Choose a font similar to mine. I have used the font named Xenippa.


Select the text layer and press Ctrl+J to duplicate it. It should be named Angel copy by default. Now, you have two text layers Angel and Angel copy. First, select the layer named Angel and double click on it to open layer styles. Apply the layer styles shown in the images below.


The color code in the image below is #666600


The two colors for the gradient are #ccccc99 and #996633...you can experiment with different colors if you like.

We are almost there...
Next, double click on the layer named 'Angel copy' and follow the images below.


The colors used in the gradient are #990000 and #cccc66

This is the effect that you will get.

Now add two nice wings or tail, a crown maybe....or anything you want to ..

Now add the following layer styles to it.


The colors are similar to the ones used in the layer named Angel.


Its done.!!


No comments:
Post a Comment
Leave a comment.. :)